Quick Start Guide
From zero to a running stack in 4 steps
Design your stack visually, Stacktic generates the code — deployment manifests, security policies, and Day-2 operations — all version-controlled in Git.
Step 1 — Prerequisites
Before you start, prepare the following:
Container Registry Token
Create a token with read/write access to your container registry (Docker Hub, GHCR, GitLab Registry, etc.). Stacktic uses this to push and pull images.
Git Repository Token
Create a fine-grained personal access token with full repository permissions. Stacktic uses this to create and manage your stack repo.
Domain
Have a valid domain ready. After deploying, update your DNS A-record to point to the APISIX gateway external IP.
kubectl get svc apisix-gateway -n ingress-apisix
# EXTERNAL-IP → update your DNS A-record
GitHub token setup (click to expand)
- Go to github.com/settings/personal-access-tokens
- Click Generate new token
- Under Repository access, select the repositories Stacktic will manage
- Under Permissions, enable all Repository and Account permissions Required — must allow all
- Generate and copy the token
Tip: Use fine-grained tokens over classic tokens for better security. Grant only the repositories Stacktic needs.

Step 2 — Configure
Sign in at staging.app.stacktic.io and create or select a Stack.
Paste your tokens in the Stack settings:
2a. Paste your Registry Token
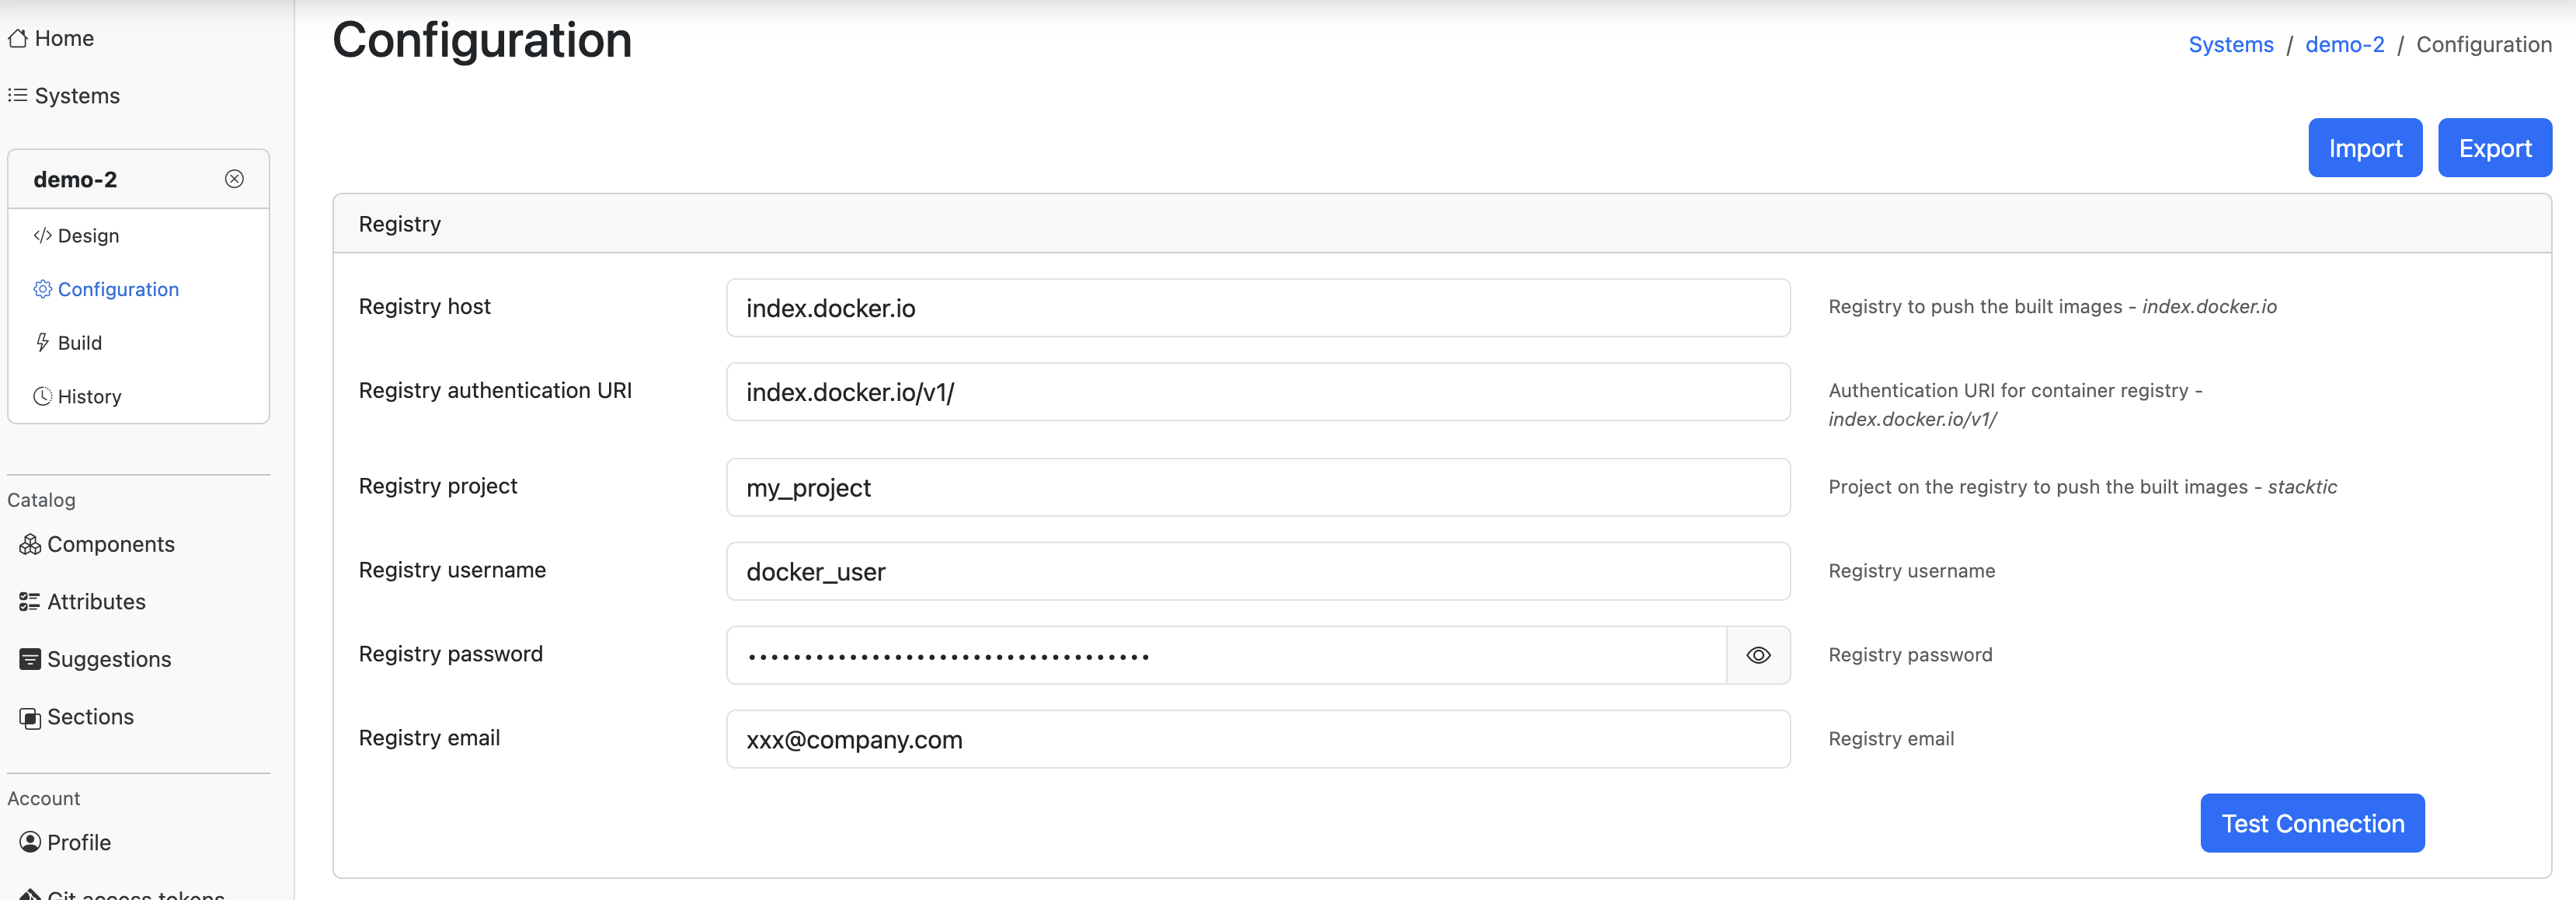
Click image to enlarge
2b. Paste your Repo Token
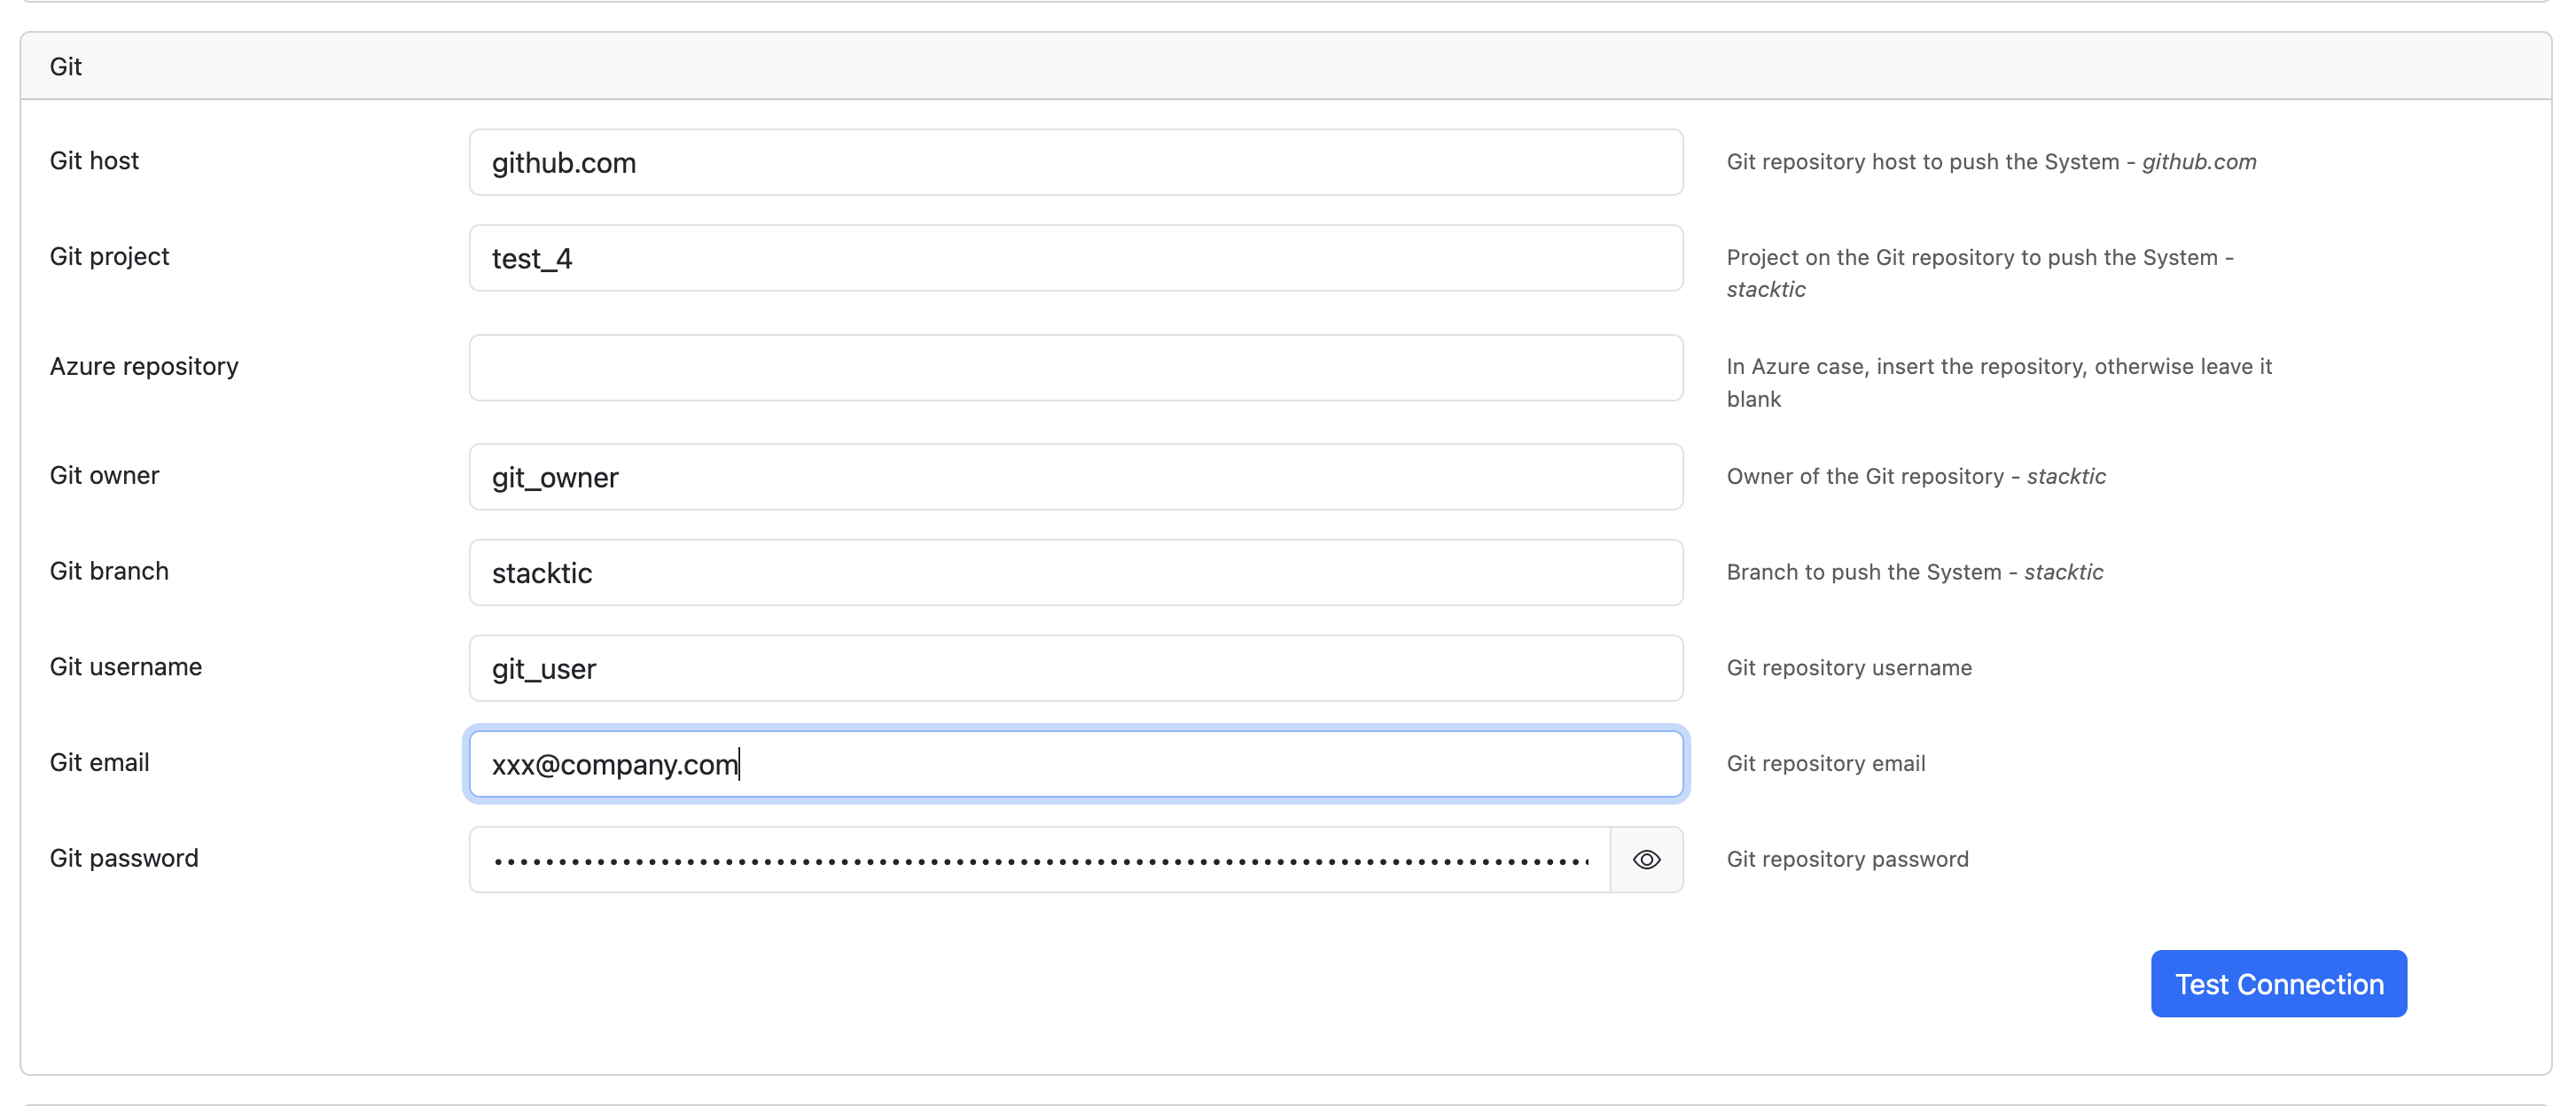
Click image to enlarge
2c. SOPS Key (optional)
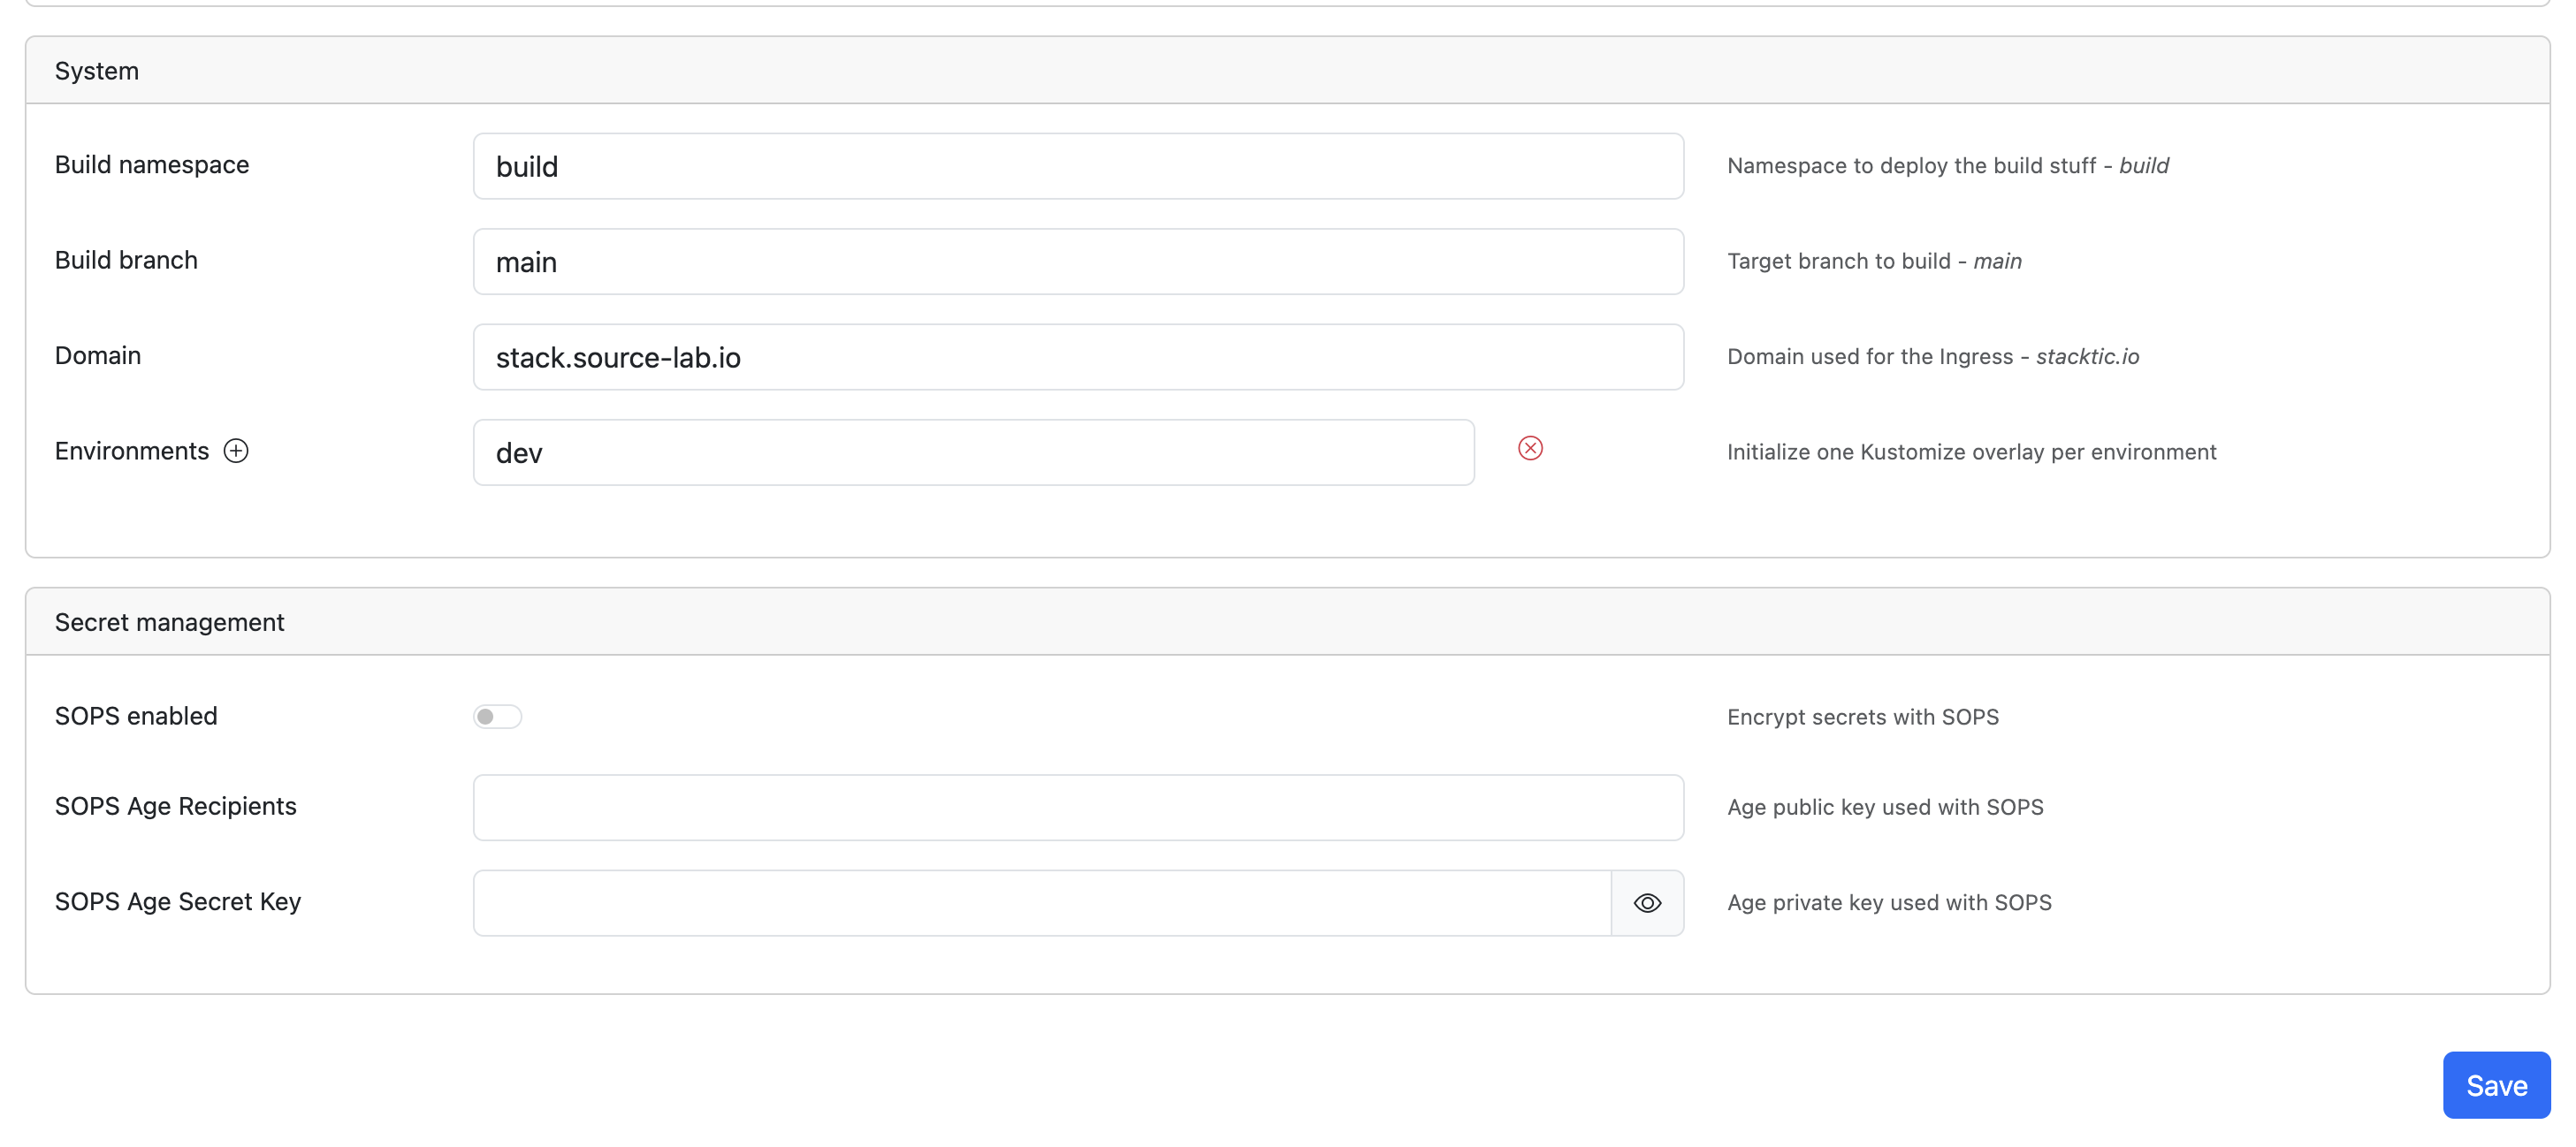
Click image to enlarge
Understanding Git Branch and Build Branch
Git Branch The source of truth. Stacktic automatically pushes the stack version and configuration to this branch. This is where the generated stack skeleton lives.
Build Branch Where your code and customizations live. Stacktic uses a merge strategy to sync changes from the Git branch into the Build branch, respecting your edits.
Most of the time these are the same branch. The merge strategy ensures Stacktic's generated updates never overwrite your custom code.
Step 3 — Design & Build
How the topology design works
Stacktic's topology design follows a simple principle:
Component
The service itself and its configuration — a backend, a database, a message broker, etc.
Sub-component
Units related to a service — a database schema, a Kafka topic, an API endpoint, or any functionality needed to design logic and relations to other components.
Link
Links define the relationship between components. A link from backend to database creates endpoints, secrets, and APIs. A link from topic to database creates Kafka Connect and its dependencies.
Attributes
Components, sub-components, and links have attributes that control automation behavior. Check the available attributes when connecting components. An empty attribute equals false — no configuration is applied. For example, if storageClass is empty, no StorageClass is defined and the cluster default is used.
Check link attributes
When you create a link, always check if link-level attributes exist. These attributes fine-tune the automation — for example, enabling TLS, setting replica counts, or configuring connection pooling. If an attribute exists but is left empty, the feature is disabled by design.
There is only one good pattern of configuration. If you are not following best practices, you are doing something wrong. Stacktic automates based on best practices and security requirements to create a top-quality, secure stack skeleton with all relationships wired correctly.
Drag, connect, build
Drag components onto the canvas and connect them. Stacktic maps all relationships automatically.
Click Build to generate the full repository:

Merge Strategy: The stacktic branch contains generated code; main is yours. Stacktic auto-merges while respecting your custom edits. You can ignore, overwrite, or merge from the UI.

Step 4 — Deploy
Clone the generated repo and apply to your Kubernetes cluster:
# Clone the generated repo
git clone <your-stack-repo>
cd <your-stack-repo>

# Build & push images (Kaniko jobs)
kubectl apply -k k8s/build/overlays/dev/ --server-side --force-conflicts

# Deploy manifests
kubectl apply -k k8s/deploy/overlays/dev/ --server-side --force-conflicts

# Verify route
kubectl get apisixroute -A
Done! Your stack is now running. Every component is connected, secured, and version-controlled.
What's Next?
FastBuild
Changed tokens, secrets, or component values? Use FastBuild — it captures ~95% of relationships and rebuilds in seconds.
git fetch origin main
git checkout main
git reset --hard origin/main
Source Code Options
| Option | Best for |
|---|---|
| External source | Point to your repo & Dockerfile |
| image_base | Push your own image |
| Templates | 100% hands-off |
Migrating an existing app?
- Import code — external repo or pre-built image
- Add databases and create links between components
- Load data — MinIO bucket job (recommended), manual restore, or
initdbscripts - Validate ingress & health checks
- Add complexity — Airflow, Kafka, RabbitMQ, etc.
- Enable Day-2 Ops — logging, monitoring, autoscaling, security policies
Understanding the Automation Flow
Once your stack is running, here's how to explore what Stacktic automates for you — in 3 steps:
Discover available links
Press the + button on any component to see all available link types. Each link represents a relationship Stacktic can automate — for example, connecting a backend to a database, or Grafana to Prometheus.
See exactly what each link automates
Click the info button on any component, sub-component, or link to see the exact automation flow — what files are generated, what configurations are injected, and how the relationship is wired end-to-end.
Read your stack-specific operations docs
Stacktic auto-generates deep operational documentation for each component in your stack. These are not generic docs — they are written specifically for your stack's configuration, specifications, and relationships. Use them to understand Day-2 operations, troubleshooting, and how every piece fits together.
Reference
Core Concepts
| Concept | Description |
|---|---|
| Component | A service — backend, PostgreSQL, Prometheus, etc. |
| Sub-component | A unit inside a component (DB schema, Kafka topic) |
| Link | Relationship between components (backend → DB) |
| Attribute | Parameter used for automation (ports, secrets, flags) |
Automation Examples
| When you connect… | Stacktic generates… |
|---|---|
| Source Code → Database | DB & user creation, connection string as Secret |
| Grafana → Prometheus | Metrics, ServiceMonitor, dashboard JSON |
| ArgoCD GitOps | Application CRs per component for multi-cluster sync |
| Kafka Topic → Database | Topic, ACLs, and KafkaConnect sink |
| Security policies | RBAC, NetworkPolicy, OPA Gatekeeper rules |